
How To
- Install Plugin
- Add Gallery
- Adding Images
- Managing Images
- Add Skins
- Add Gallery to Page / Post
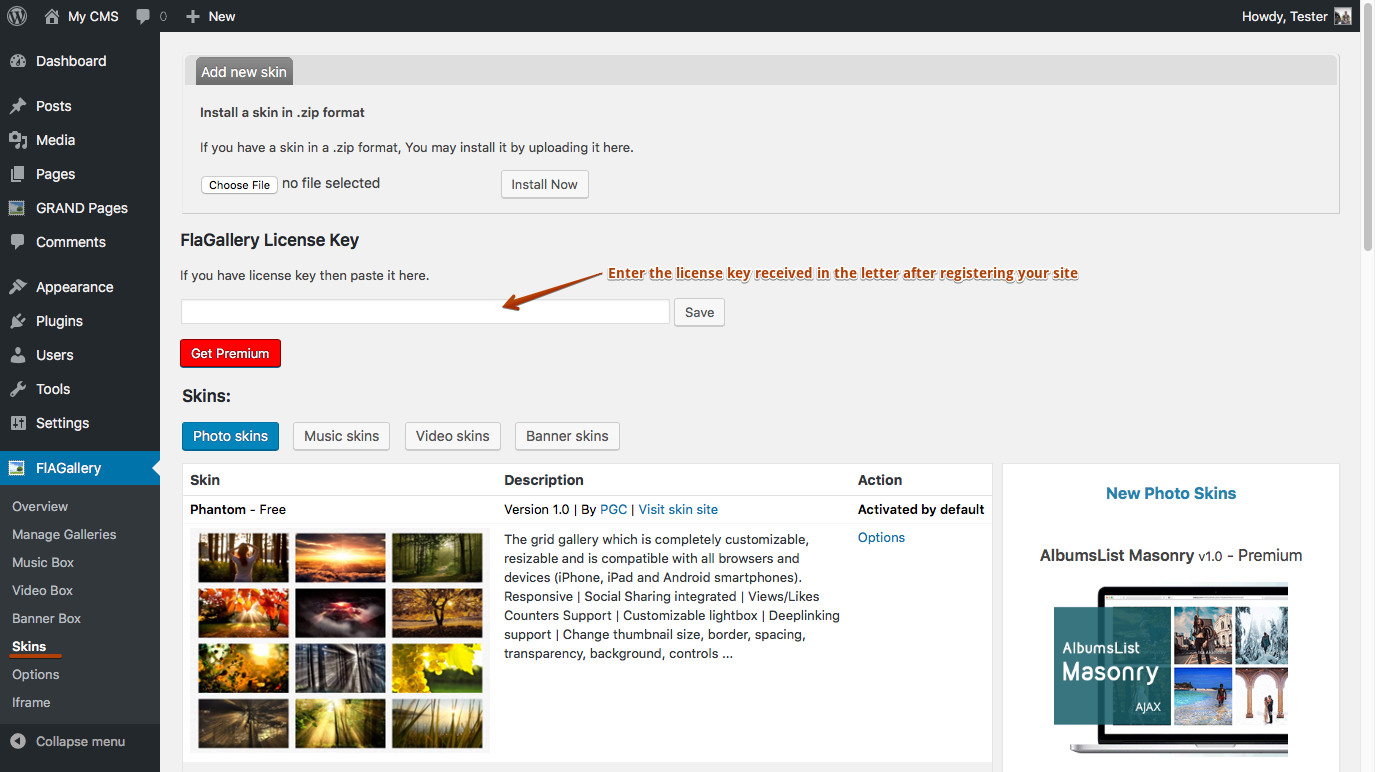
- How to add a license key for premium skins
- Video
Install and Activate FLAGallery Plugin
Download free GRAND FlAGallery plugin and install.

After installing the plugin you need to activate it.
Create a new gallery
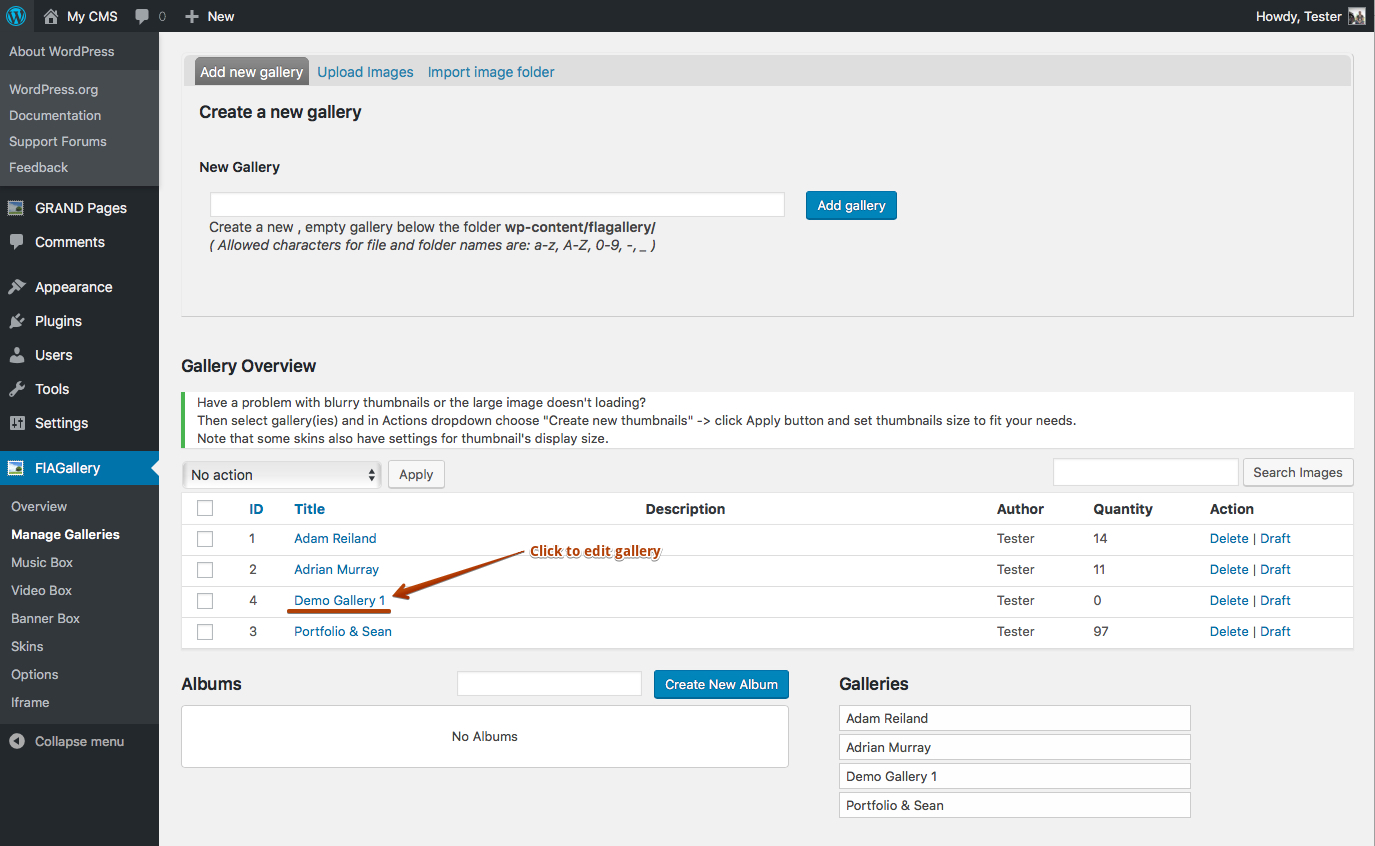
The first thing you will want to do is upload some images. Before you can do that, you have to create a gallery. You do that on the Manage Galleries -> Add Gallery tab. Galleries are created below the path specified on the General Options page, typically wp-content/flagallery/. Creating a gallery actually creates a new folder on the server to store the images.
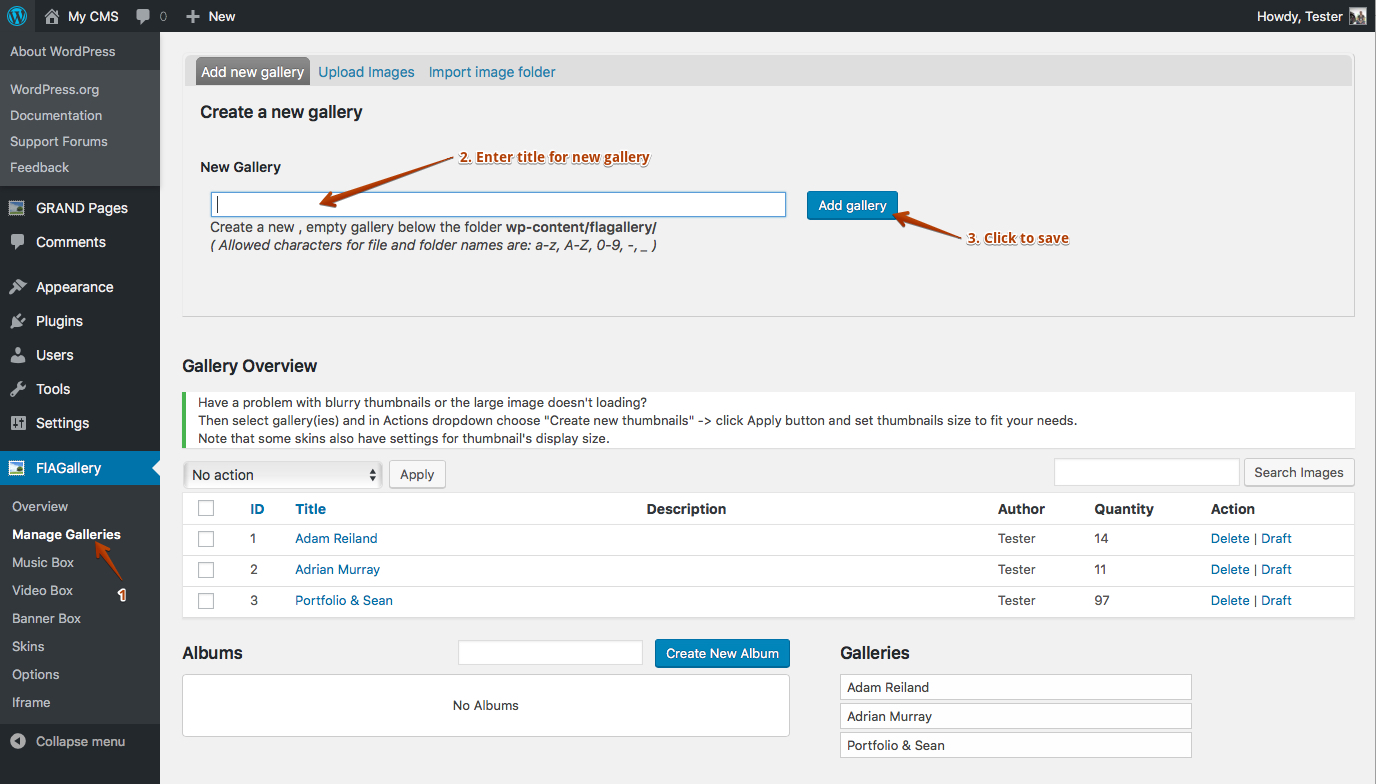
Choose the name of your gallery very carefully as once it’s been created it is very difficult to change it. You’ll have to rename the folder on the server’s disk.
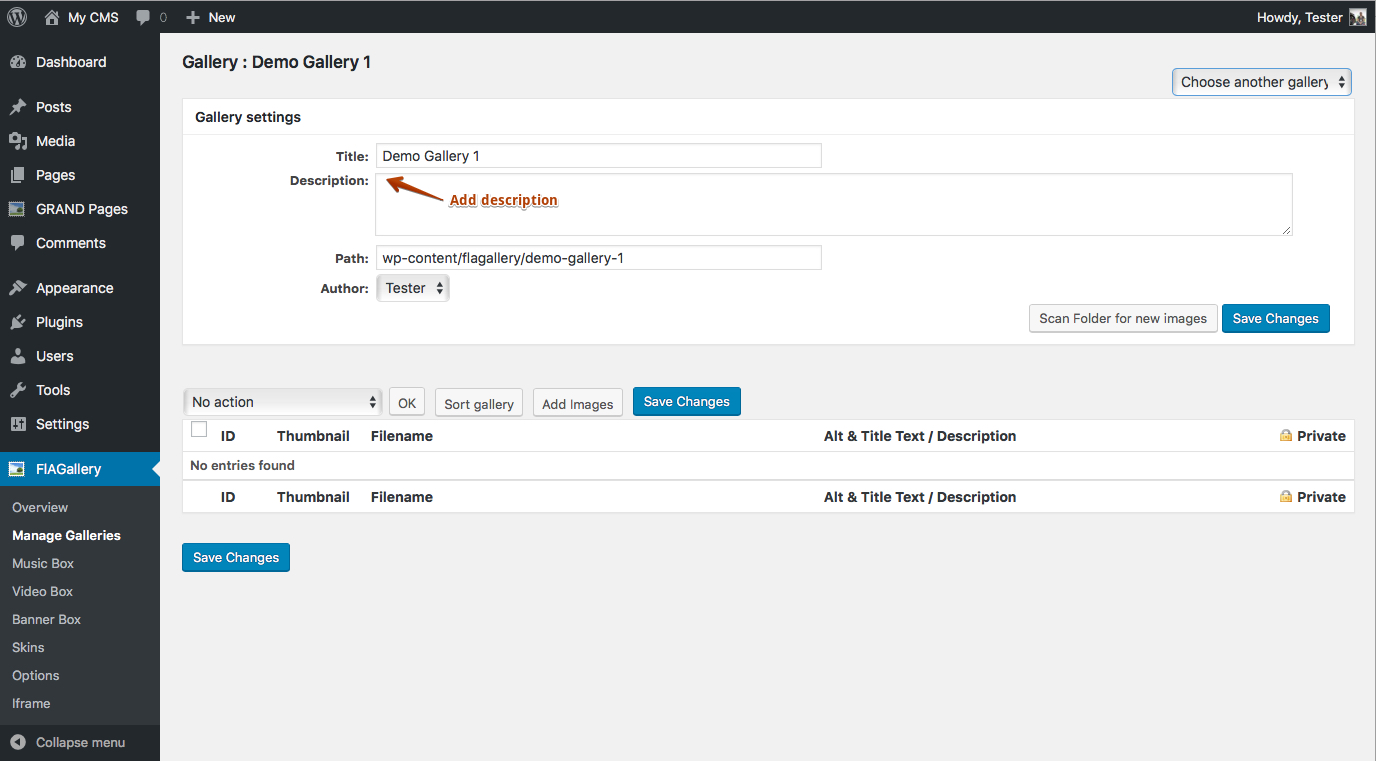
Edit gallery.
Add description for gallery.
- Edit the name and description of the gallery.
- Edit the path (although this only changes the path, it doesn’t rename it).
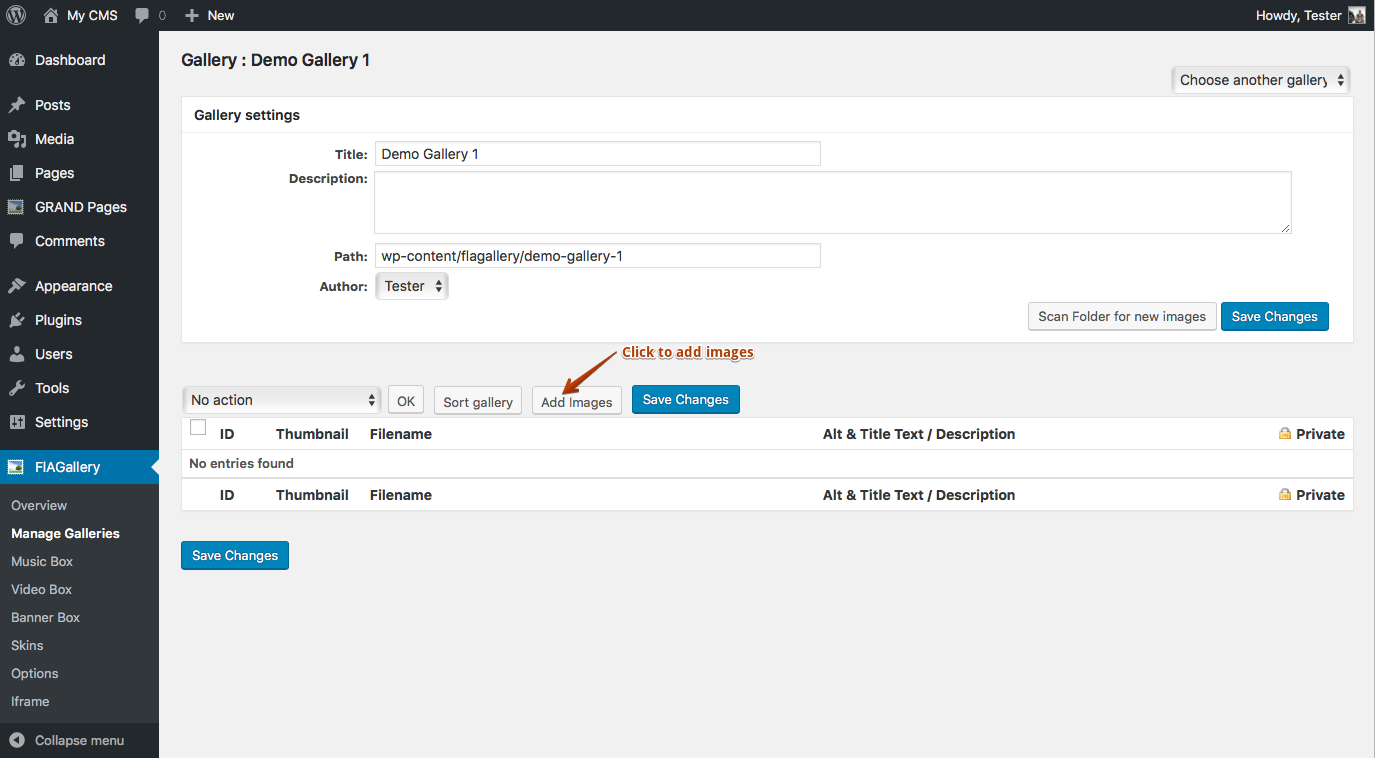
Adding Images
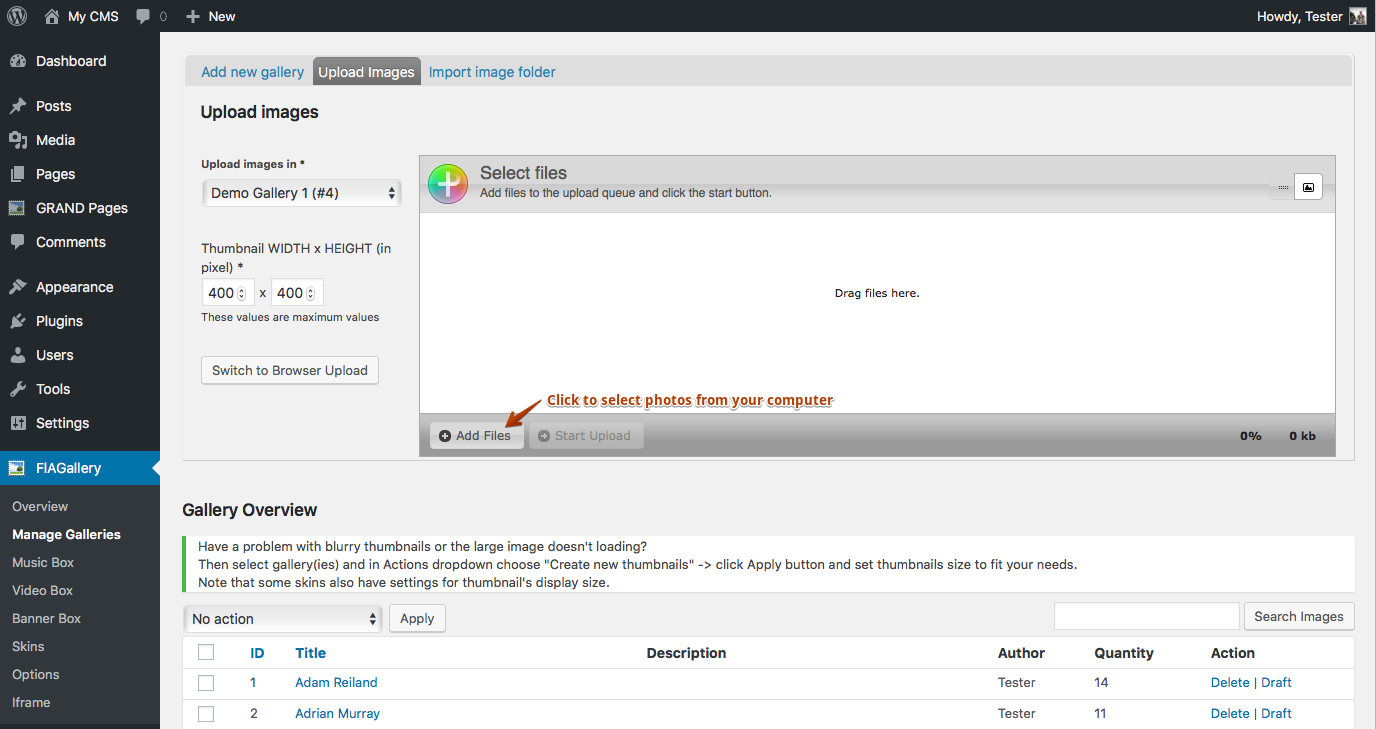
Once you’ve created a gallery you can add images to it. There are two different ways to add images to a gallery, by uploading them and by copying them to a location and then scanning the directory.
Upload images one or more at a time. This is done from the Upload Images tab on the Manage Galleries page. You can select multiple files to upload and see progress of each image as it is being uploaded.
The queue is ready, and you can start upload
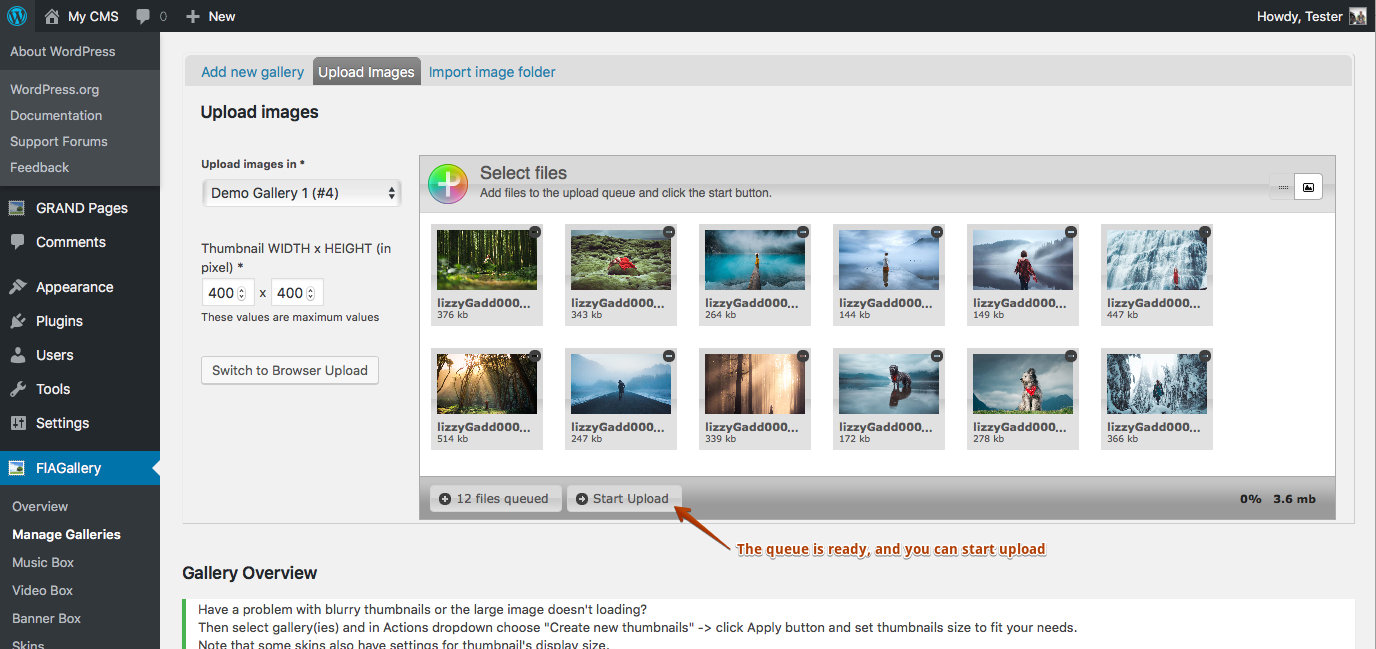
Note that when uploading images, check that the php.ini file for your server sets the maximum file upload size high enough.
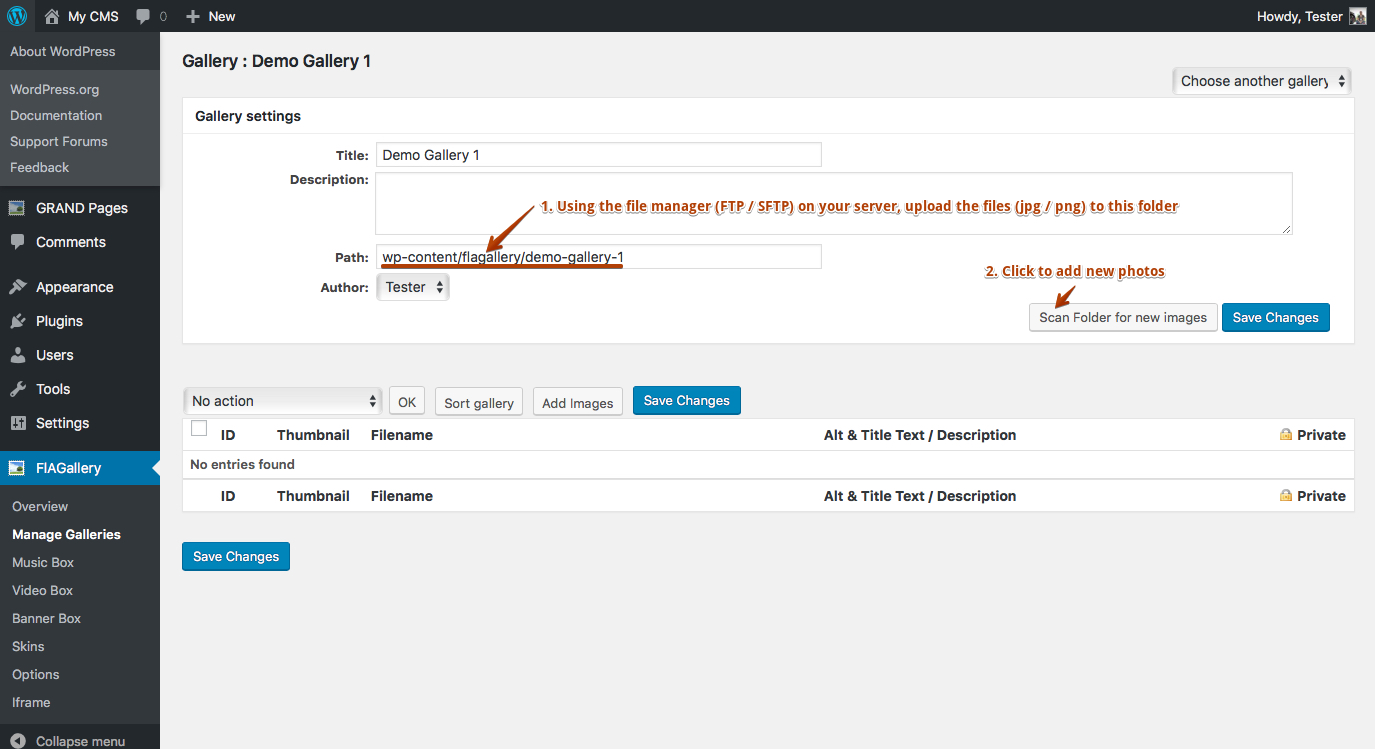
Import images already in your gallery folder. To do this:
- Go to the Manage Gallery page.
- Click on the Edit link for your gallery.
- Using the file manager (FTP / SFTP) on your server, upload the files (jpg / png) to this folder.
- Click the Scan Folder for New Images button.
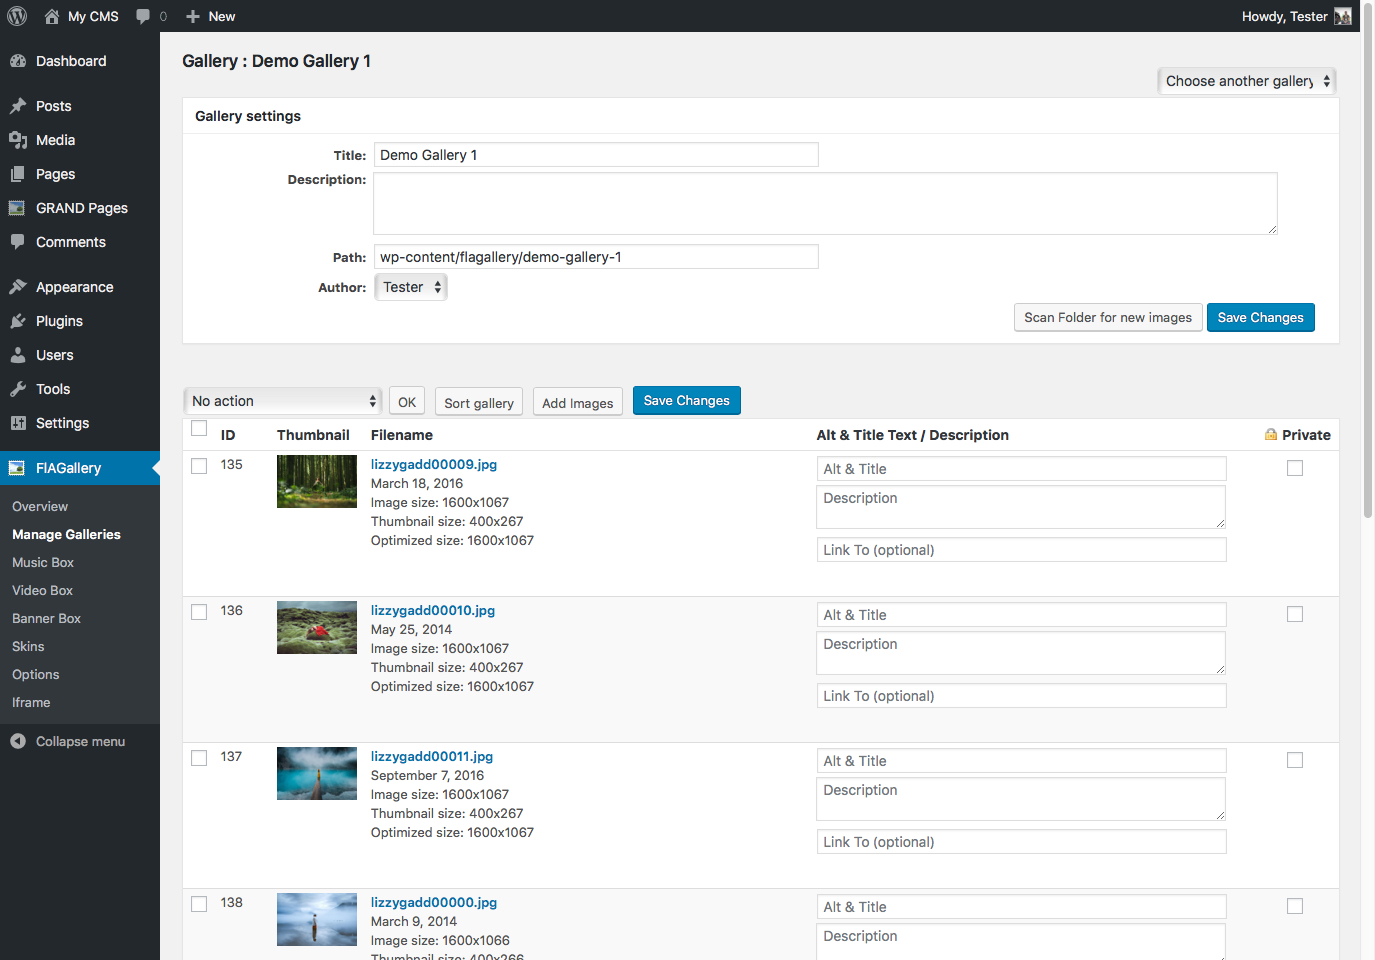
The gallery is ready for publication
Managing Images
Once you get images into a gallery, you can perform a number of different operations on them. Probably the first thing you’ll want to do is to annotate them. While you’re at it you may as well add a description to your gallery.
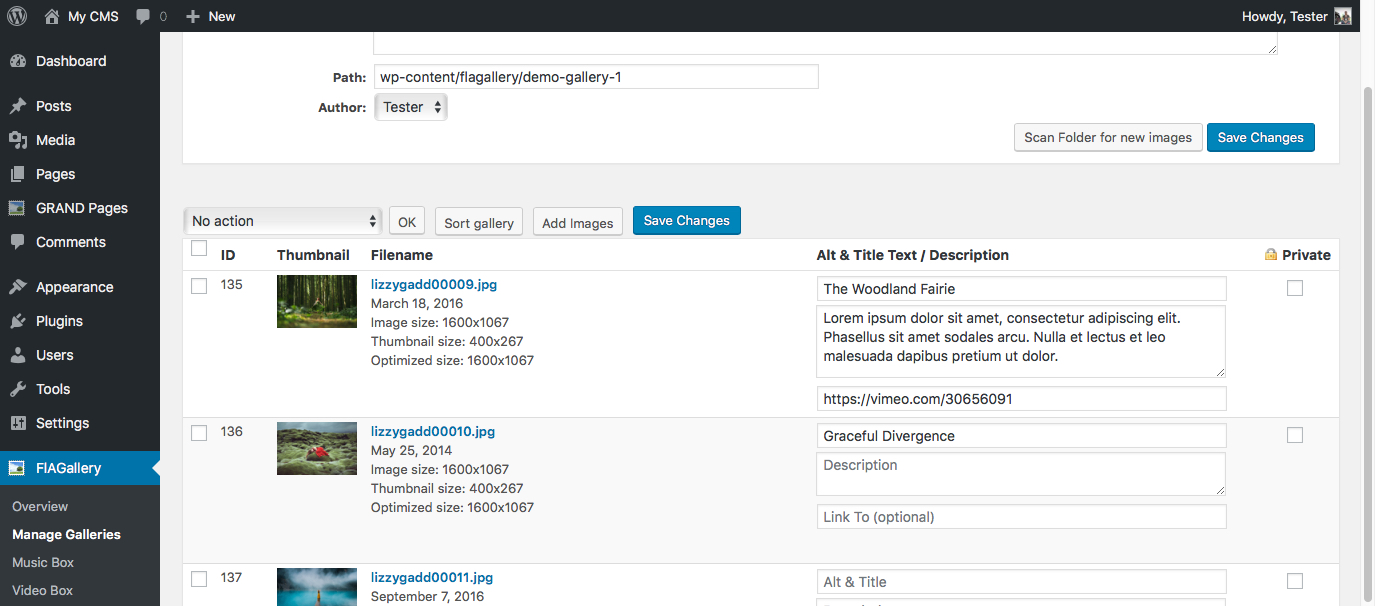
The Menage Gallery page provides a lot of flexibility and allows you to make a lot of changes at once. One thing you’ll want to be careful of, however, is to avoid doing to many operations that take a lot of time, such as regenerating thumbnails. Doing so can cause the operation to timeout.
Here is a summary of the operations that can be performed on images on the Manage Gallery page.
- Specify a description for each image.
- Specify alternate title text for each image.
- Add links to other sources
- Delete an image. The image file itself will only be deleted if the Delete image files option is enabled on the General Options page.
- Generate new (create custom) thumbnails for selected images. This is especially useful when you change the thumbnail options.
- Resize images. This is useful when you set resize parameters on the Images option page.
- Scan the folder for new images as described above.
- View image meta data.
- Sort images. Only when Custom order option is selected on Options page.
- Lock images for unregistered users.
Add Skins
All new skins and updates will be available in the right sidebar.
Each gallery can have its own unique look.
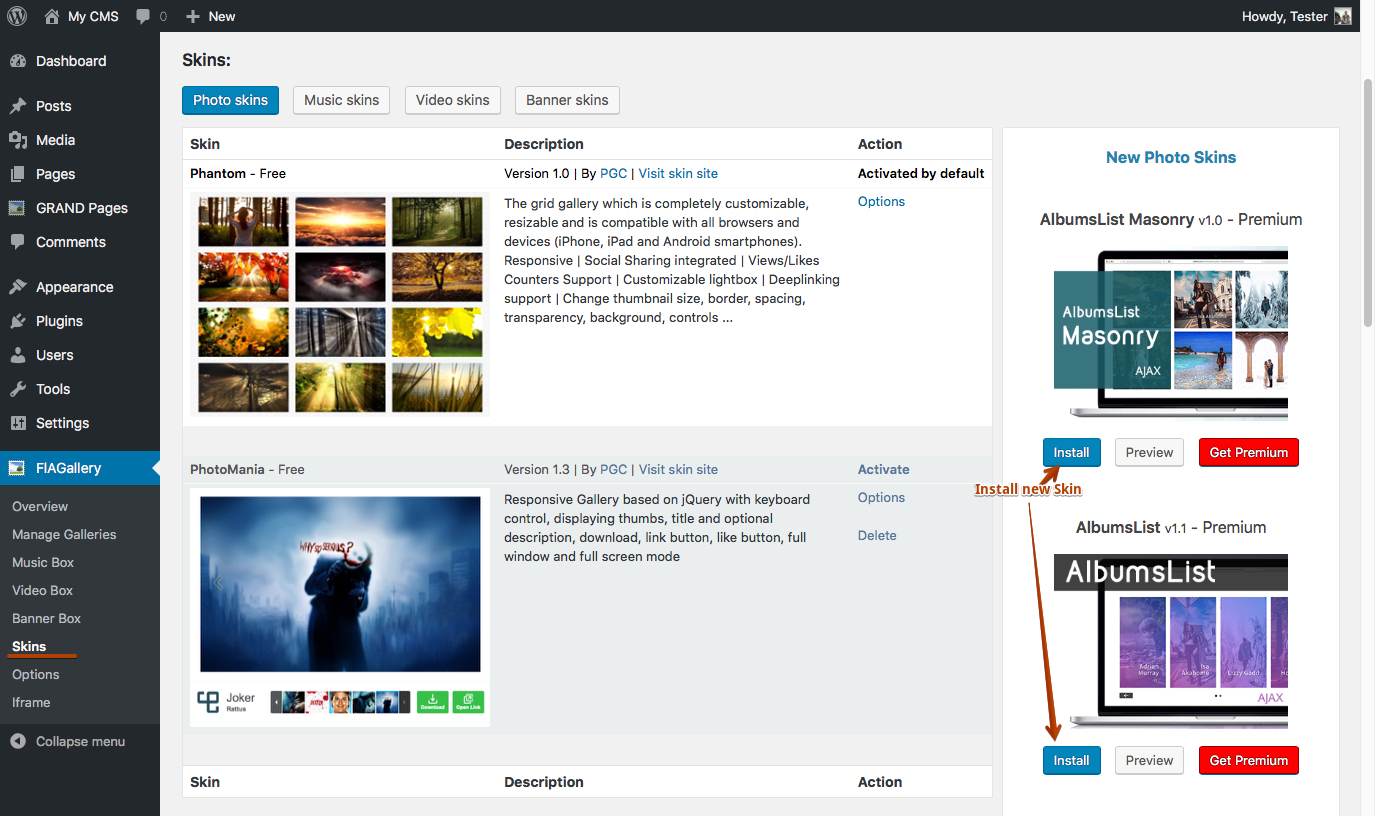
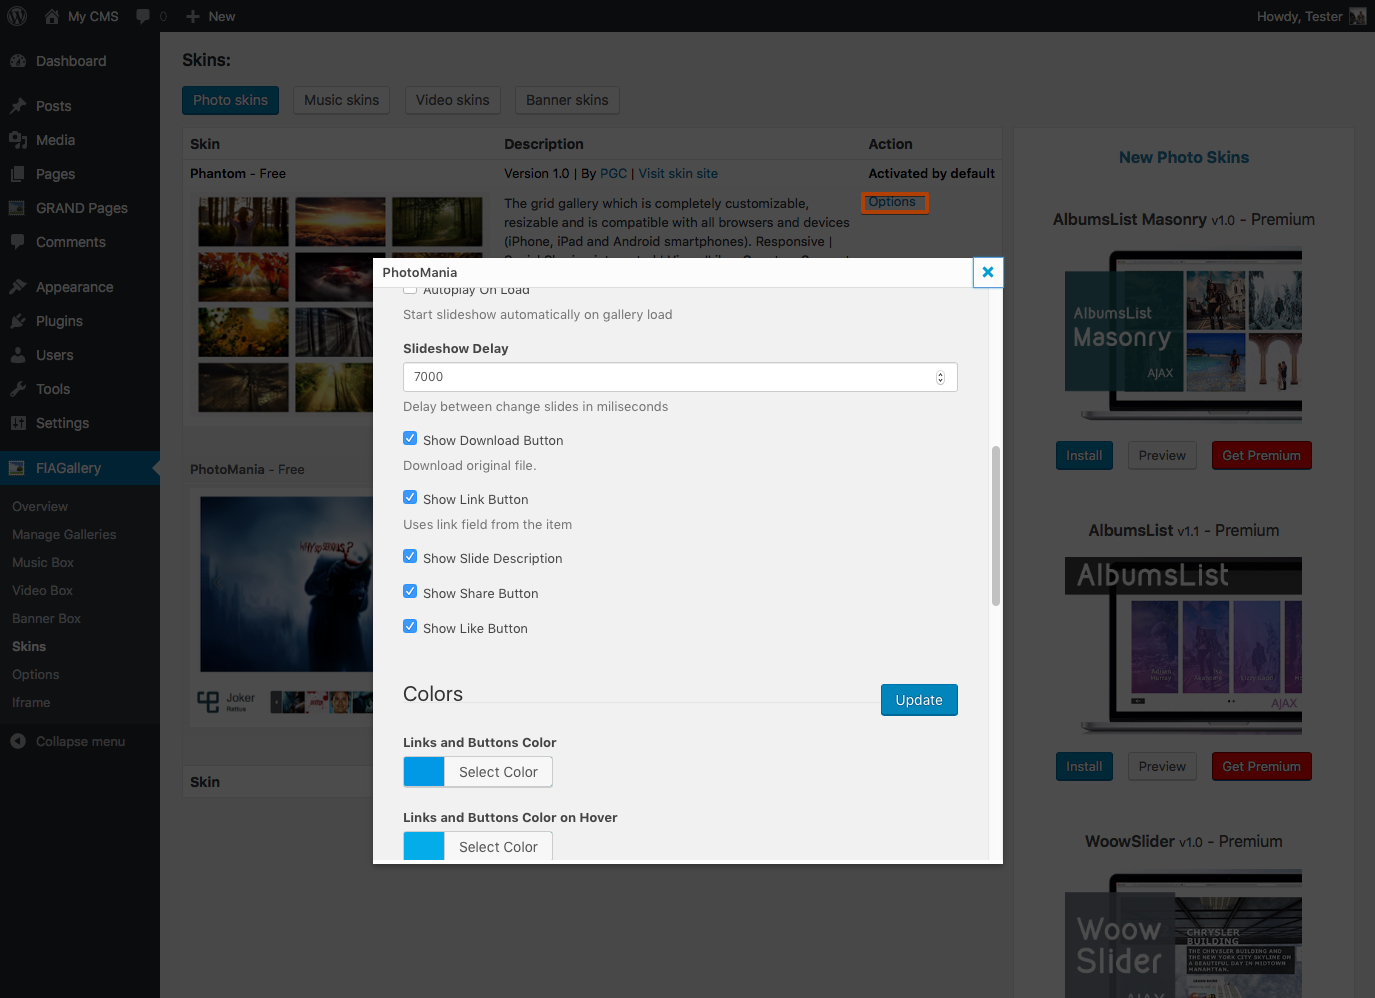
Skin Options.
Each skin has its own set of properties. To change these properties, there is a control panel (Click to Options)
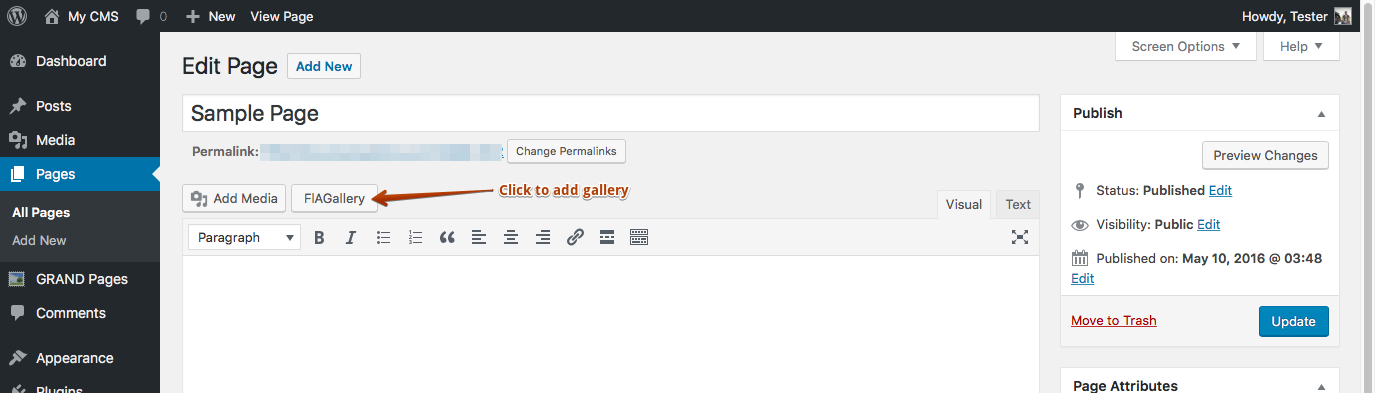
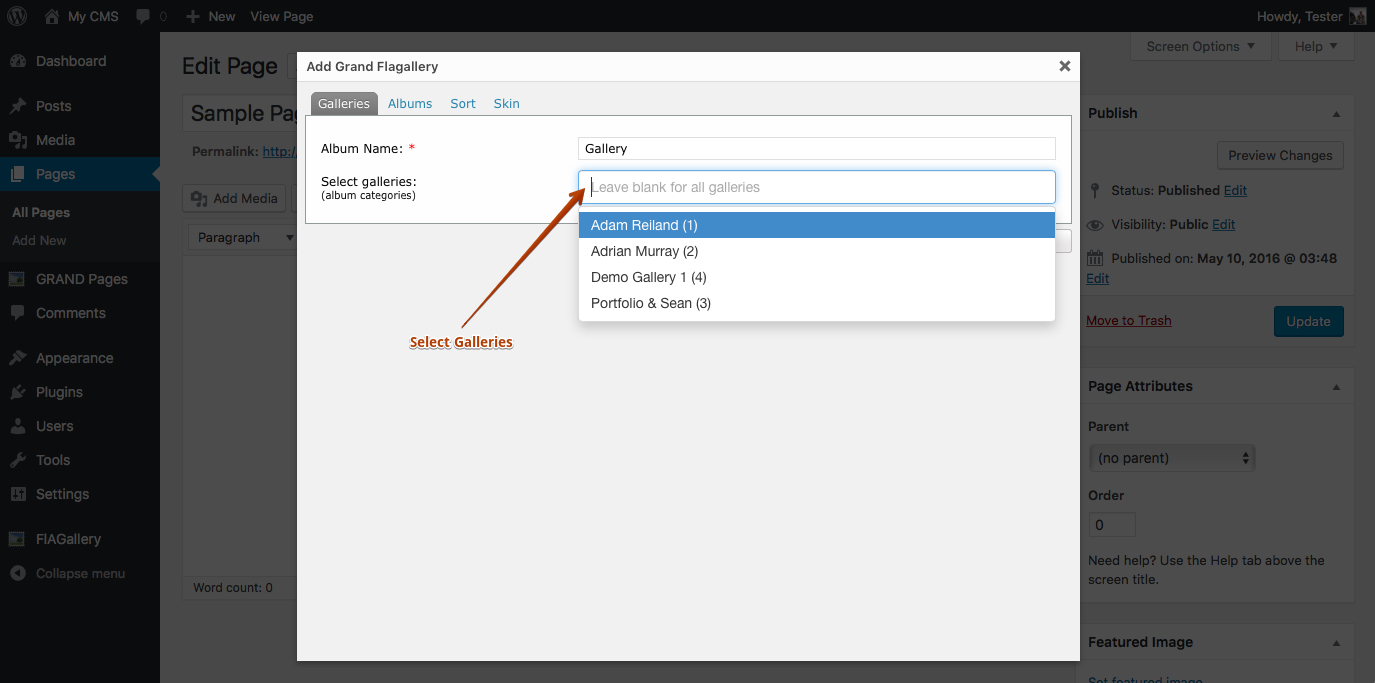
Add Gallery to Page / Post
Insert Shortcode
Go to your post/page and insert shortcode tag easy with FlAGallery button
Select galleries for publish
Additional shortcode parameters
[flagallery gid=all]If you use gid=all:
[flagallery gid=all name="Gallery" orderby=title order=ASC exclude=3,5]This shortcode will display all galleries (except ID=3 and ID=5) sorted by title, ASC order.
Wanna display only three galleries in specific order? No problem:
[flagallery gid=4,2,5 name="Gallery"]Above shortcode will display first gallery with ID=4, then with ID=2 and ID=5 in flash categories.
Custom skin parameters in shortcode
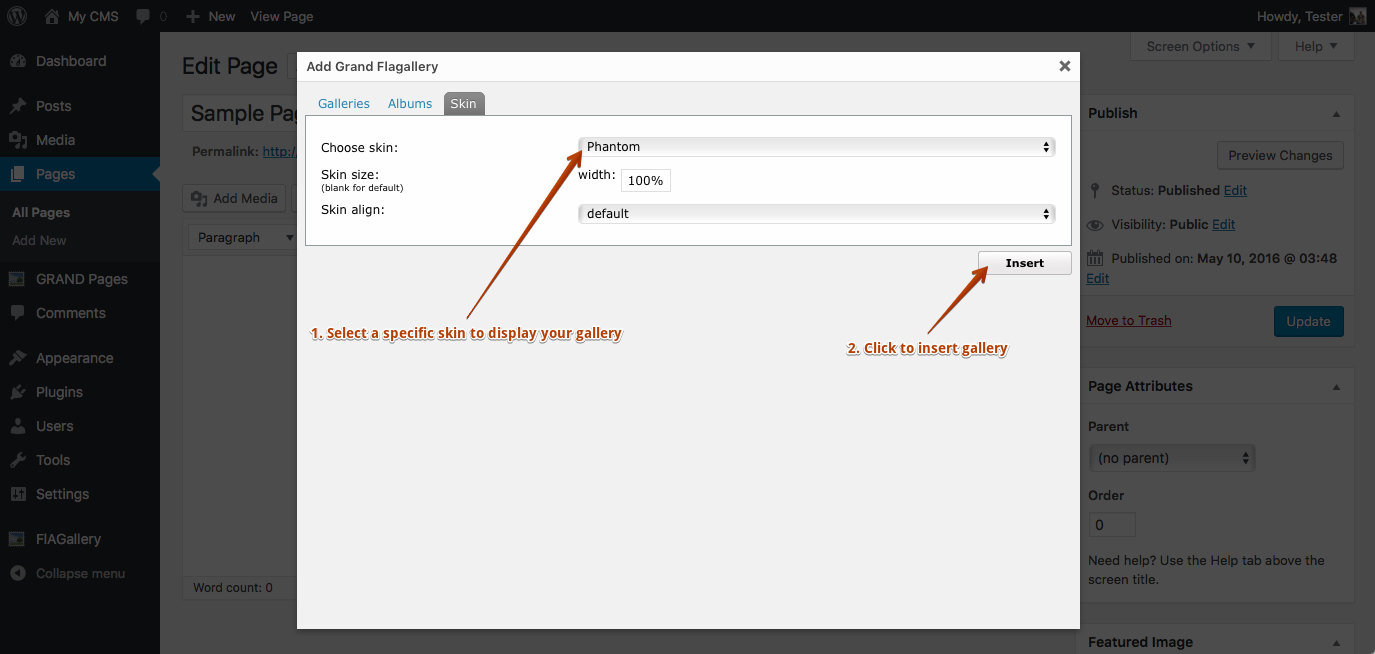
Check custom settings when insert shortcode and go to Skin tab:
[flagallery gid=3,4,5 name="Auto and Moto" w=100% h=480 skin=phantom ]How to add a license key for premium skins
Enter the license key received in the letter after registering your site.
Short video guide
That’s All! Enjoy.